Quick Start
This quick start will go through a tutorial of building a simple "Hello World" data process in LOC Studio using JavaScript.
This data process won't do much - it will respond to HTTP POST requests and return greeting messages. But this will give you a clear idea of what's it like to develop and deploy data processes in LOC.
This tutorial uses JavaScript and LOC Studio, which takes about 5-10 minutes ⏱️ providing you already have an account set up and LOC license is activated.
The CLI TypeScript versions of the example can be found at the end of this tutorial.
For example, if you invoke it with this JSON payload
{ "name": "Arthur Dent" }
The data process should respond with
{ "message": "Hello, Arthur Dent!" }
The whole process is like this:
Login LOC
First log in LOC Studio:
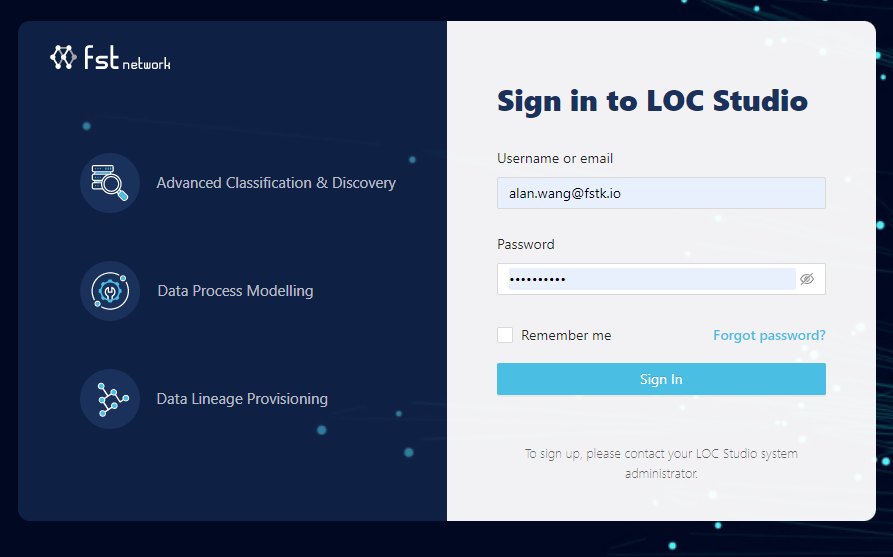
See User Management for how to setup a new account. You may need to contact your LOC Studio administrator.
You will be automatically logged out after some time of inactivity.
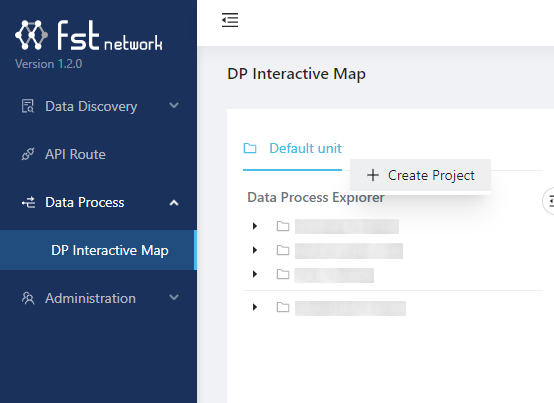
Create a Project and a Scenario
Go to Data Process panel then DP Interactive Map. First right click the Default unit and create a project (for example, My Project):

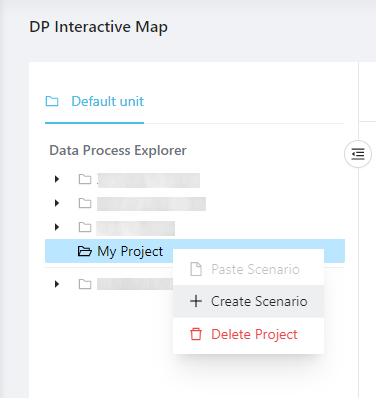
Then right click the new project and create a scenario (for example, Demo).
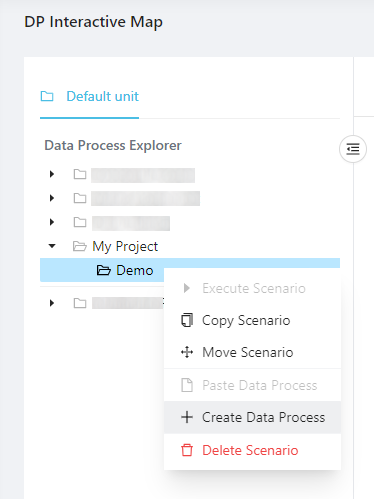
Create a Data Process
Right click the scenario and create a data process (with a name, for example, Hello World):

The screen will show the newly created data process:
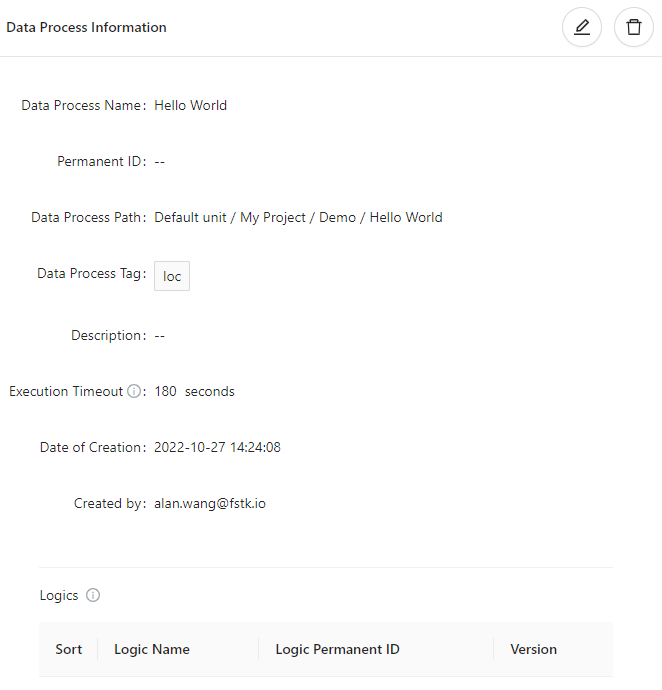
The tags are not necessary but feel free to add some. Click Create to create the data process.
Create Logic
A data process has at least one generic logic and only one aggregator logic. In this demo we'll have one for each.
The generic logic will receive the HTTP request payload and extract the name, then send it to the aggregator logic, which will in turn send it back to the user.
Create a Generic Logic
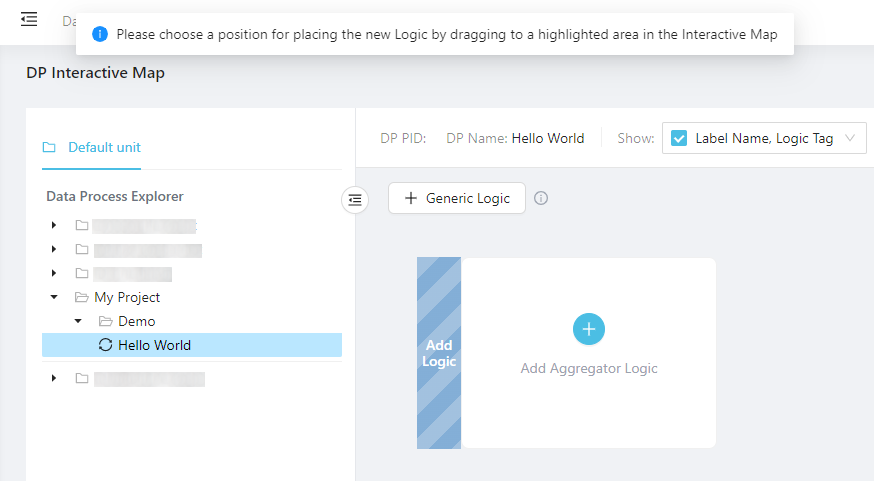
Now click on the new data process to see the logic creation window. You'll see there's already an aggregator logic present.
Click + Generic Logic then select Add Logic in front of the aggregator logic:
Give the generic logic a name (and some tags if you like):
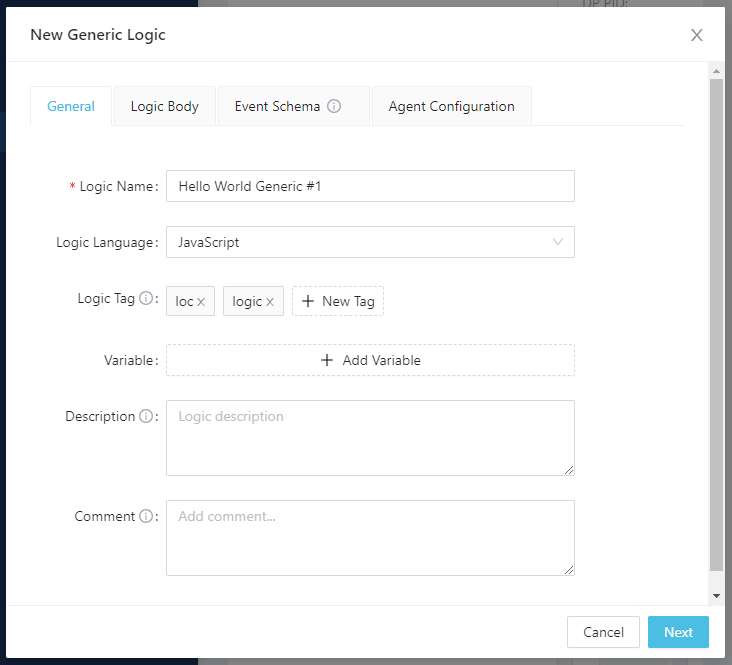
Click Next to switch to the Logic Body tab. This is where we input the actual code.
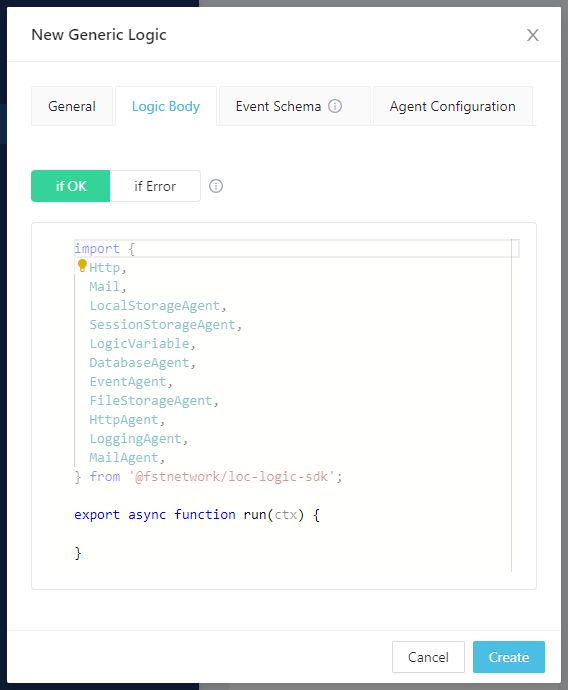
Notice that there are two tabs down here - If OK and If Error. This is because each logic actually has two functions, one for normal operation and another for error handling.
Generic Code Implementation
First copy the following code to If OK:
import {
    Http,
    Mail,
    LocalStorageAgent,
    SessionStorageAgent,
    LogicVariable,
    DatabaseAgent,
    EventAgent,
    FileStorageAgent,
    HttpAgent,
    LoggingAgent,
    MailAgent,
} from "@fstnetwork/loc-logic-sdk";

export async function run(ctx) {
    // read HTTP payload
    const payload = await ctx.payload();

    // get payload body
    const data = payload.http.request.data;

    // decode body from Uint8Array to string and convert to JSON
    const parsed = JSON.parse(new TextDecoder().decode(new Uint8Array(data)));

    // log parsed JSON
    LoggingAgent.info({ parsed_json: parsed });

    // extract name field (and set it to a default string "World" if not exist)
    const name = parsed?.name || "World";

    // write the name variable into session storage
    await SessionStorageAgent.putString("name", name);
}
You can press hot keys in the code box to format the code (adding correct indentations, etc.):
- Windows:
Alt+Shift+F - macOS:
Shift+Option+F - Linux:
Ctrl+Shift+I
Let's paused a bit to understand what's happening here.
run is the main code body of this logic, sort of like main in some programming languages. It will be injected with ctx, which is the data context object that contains several useful stuff, like HTTP request payload and task information.
Beside the context object, you can also access a series of built-in functionalities called agents.
-
The first line reads the HTTP payload, which has to be convert from Uint8Array (an array of numbers representing byte data) to string.
TextDecoderis part of the Web API and is supported by LOC's logic runtime. We assume that the request body is JSON and can be converted to a JSON object. -
The second line tried to read a "name" field in the JSON object. If it returns unknown (the field does not exist), the JavaScript logical or operator (
||) returns the default value"World". -
The third line of code uses the session storage agent to write a value into the data process' session, which is a temporary storage used by the data process. The variable can be accessed by any logic after this one, until the data process has completed its task.
Also notice that we use await keyword in front of SessionStorageAgent.putString. This is because the function is asynchronous and we ned to wait until the action is finished. Otherwise the data won't be written into session storage
Next is the If Error block.
If something in run or If OK block went wrong, handleError will be called with the error (and the same error will be passed down to all logic). See other parts of the documentation for more information.
For now we will only log the error if present (which will appear in the Execution History panel in Studio afterwards):
export async function handleError(ctx, error) {
    // error logging
    LoggingAgent.error(error.message);
}
Finally click Create to create the generic logic.
Do not mind the Event Schema tab - it has no use for us here anyway.
Create a Aggregator Logic
Now click Add Aggregator Logic on the screen. Same as before, give it a name and switch to the Logic Body tab. Notice that aggregator cannot have tags and do not have event schemas.
Aggregator Code Implementation
import {
    SessionStorageAgent,
    LoggingAgent,
    ResultAgent,
} from "@fstnetwork/loc-logic-sdk";

export async function run(ctx) {
    // read name variable from session store
    const name = await SessionStorageAgent.get("name");

    // finalise result
    ResultAgent.finalize({
        status: "ok",
        response: {
            message: `Hello, ${name}!`,
        },
    });
}
The result agent will return a JSON object (with the status, the task ID as well as our greeting message) to whoever invoked this data process.
The status field above is not the HTTP response code, but an user-defined one.
Next we'll add some code to handleError of the aggregator. It will return a JSON object as well, except that this time the error message and error stack (the origin of the code where the error happened) are included:
export async function handleError(ctx, error) {
    // finalise result withe error message
    const err = {
        error: true,
        errorMessage: error.message,
        stack: error.stack,
        taskId: ctx.task.taskId,
    };

    LoggingAgent.error(err);
    ResultAgent.finalize(err);
}
Again click Create to finish.
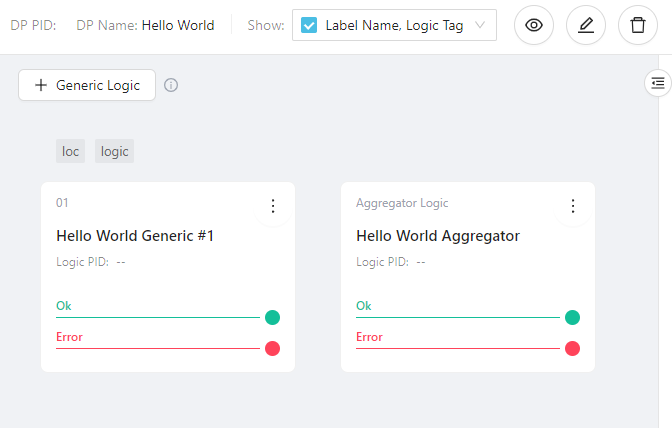
When everything is in place, your data process should look like this:
Deploy the Data Process
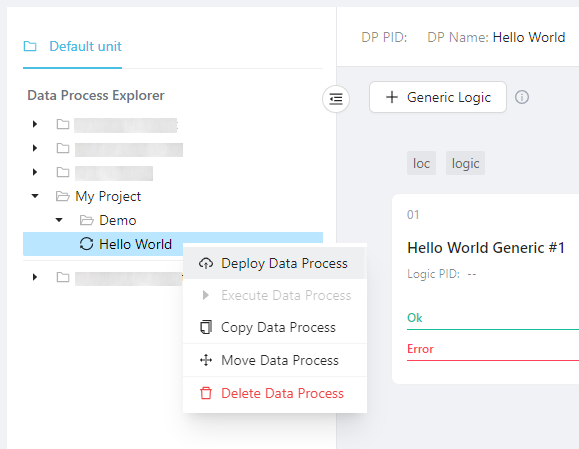
Now the data process is ready to be deployed. Right click it and select Deploy Data Process:
Wait a moment and you should see the success message:

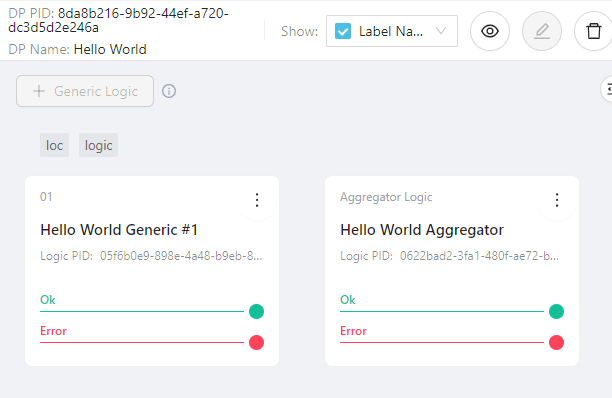
Now the data process shows a green dot and has a PID (permanent ID):
Congratulations! You have deployed your very first LOC data process.
Data processes and logic can only be modified when the data process is undeployed (the container will be removed from Kubernetes).
Test with Simple Execution
When a data process is deployed, it can be tested with a mechanism called single data process execution.
Basically, we pass a JSON file to it which simulates the payload and execute the data process, read the finalised result without using actual triggers (like API routes). This is only intended for testing purposes.
First create a local JSON file with the following content:
{
    "name": "Arthur Dent"
}
Tip on creating blank files
You can either copy the profile from your team or create a blank file then copy/paste the content.
macOS and Linux users can do this with
touch <profile name>.yaml
Or (for Windows users)
type nul > <profile name>.yaml
Then open the file with an editor, copy/paste the profile and save it.
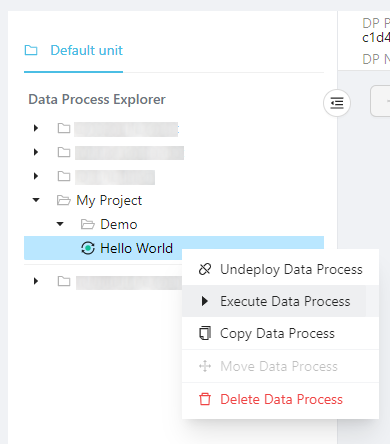
Now right click the data process and select Execute Data Process:
Open or drag the payload.json you've created into the dialog box:
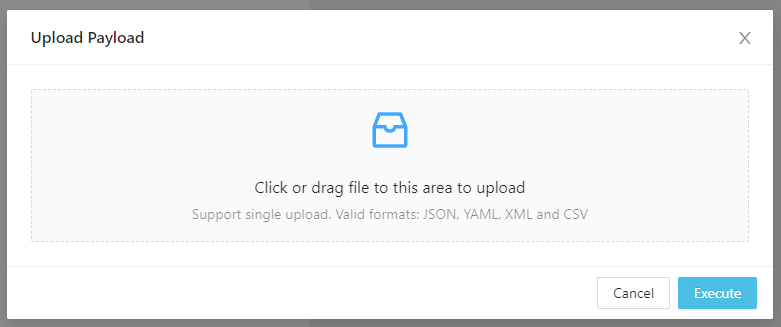
You should be able to see the content of the payload:

Click Execute and wait for it to finish:
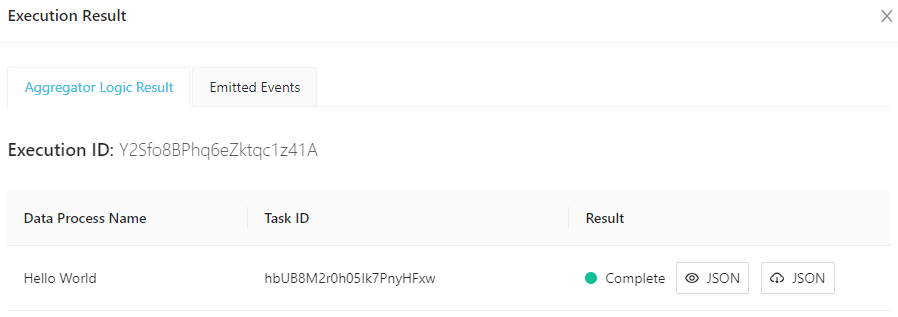
Click the JSON icon to see the finalised result:

This is exactly what we expect to receive from this "Hello World" data process.
The data process would return a error message if the JSON payload is not valid.
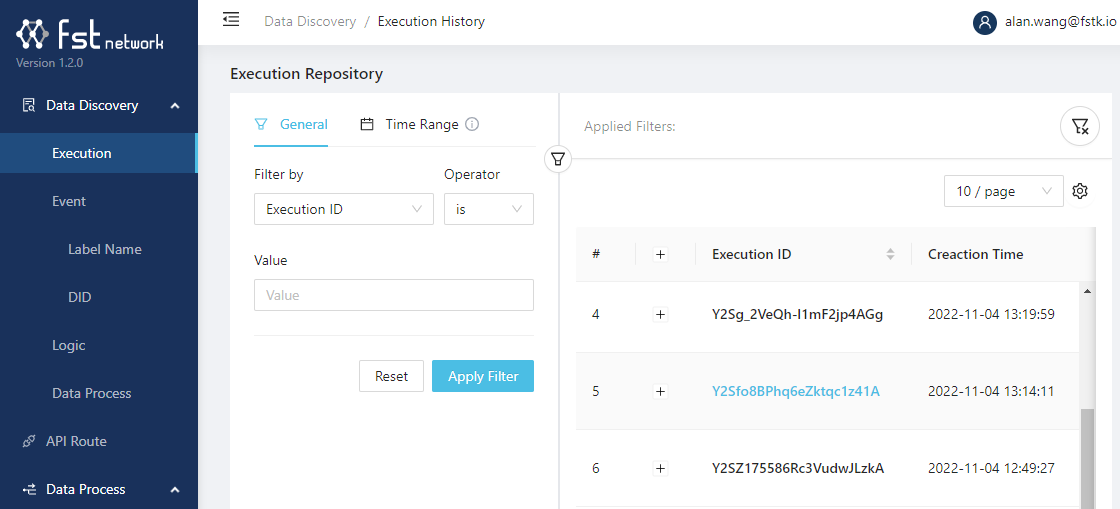
View Execution History Logs
Go to Data Discovery and click the sub panel Execution. Find the execution ID we've seen earlier in the execution result and click the ID:
Notice that LOC lists the execution as triggered by an API route with all zero ID. This is because a single execution is essentially using a simulated API route.
This is the execution history of the single execution, which contains the execution status, the JSON payload, the logs outputted by logging agent as well as the returned result.
Click the plus sign (+) to expand logic logs:
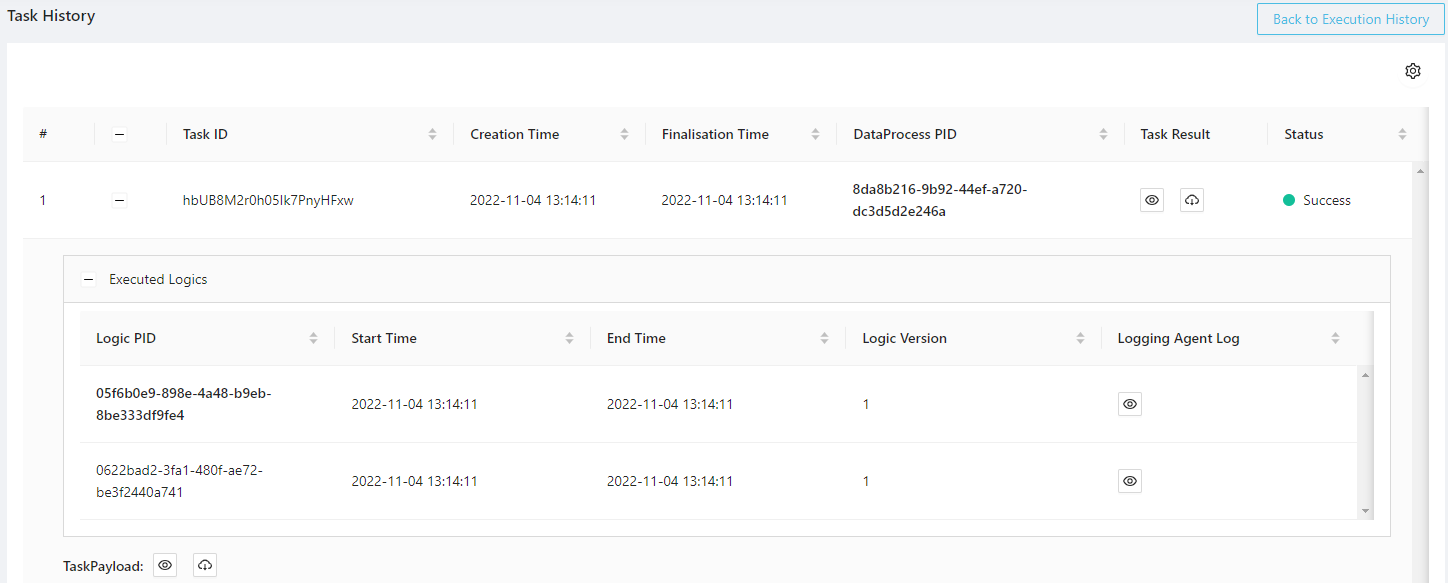
Click the eye icon on the left of each logic to see logs:

Logs are incredibly useful for debugging since if a data process failed to run, you can try to locate the problem by judging where did the logs stop.
Create an API Route
Single execution is convenient, but not a practical way to invoke them in the real world.
The most common way is to create an API route, which will become a HTTP endpoint in LOC's API router. It can be invoked by any HTTP clients and thus can be integrated with other systems.
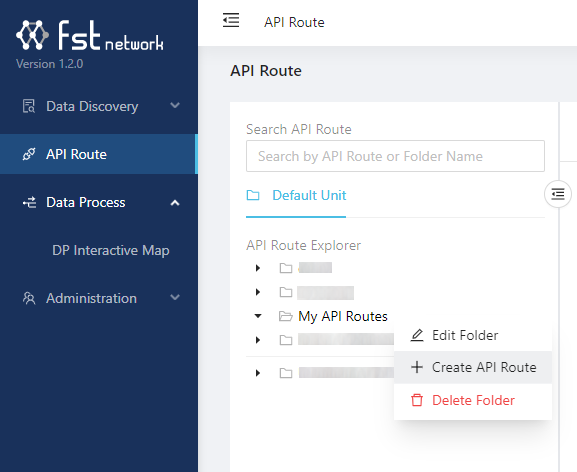
Go to API Route, right click Default Unit to create a directory (for example, My API Routes) and then right click the directory to create an API route:
Give the API route a name (here we use Hello World API) and make sure you have the following configurations:
-
Set the HTTP Method to POST.
-
URL to
/hello. -
Response Content Type to JSON.
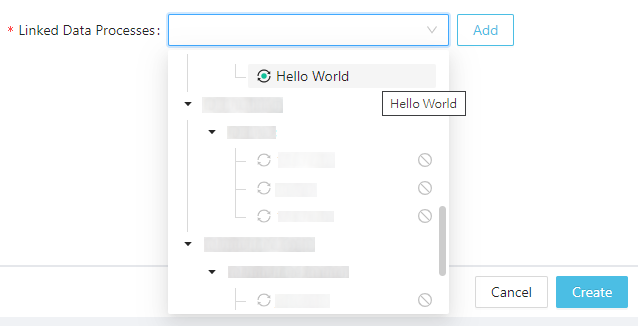
-
Linked Data Processes: select the data process Hello World (or whatever you named it) and click Add.
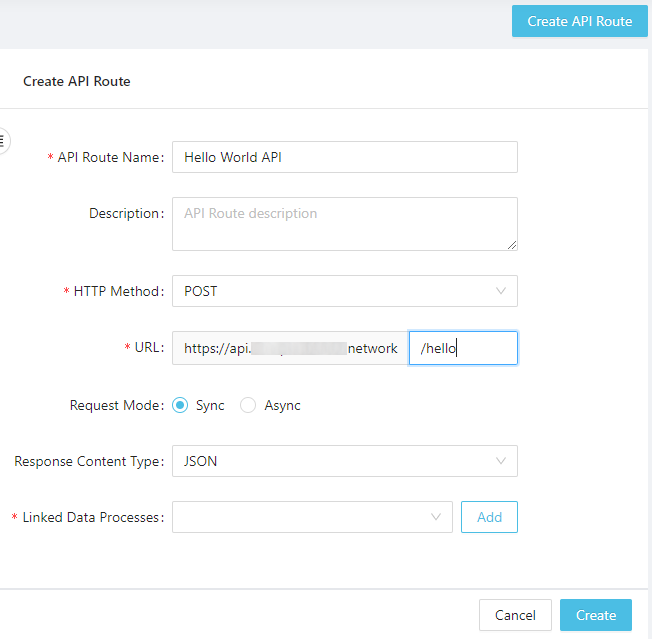

And click Create on bottom-right corner to finish.
The API route URL can also be something like /greeting/hello.
Invoke With the API Route
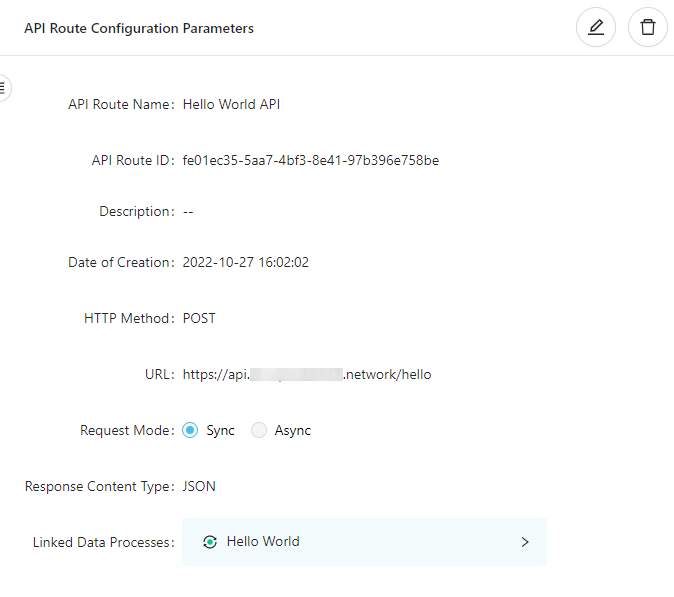
Now wait for a bit for the API route to take effect.
From the API route screen above, we've learned that the full URL is https://api.**********.network/hello. Now you can use a HTTP client (for example, Insomnia or Postman) to send a POST request a JSON payload:

Or by using curl on macOS or Linux:
curl -X POST https://api.**********.network/hello \
    -H "Content-Type: application/json" \
    -d '{"name":"Ford Perfect"}'
The result would be like
{
    "_status": 200,
    "_metadata": {
        "executionId": "Y2Sg_2VeQh-l1mF2jp4AGg",
        "triggerType": "ApiRoute",
        "triggerId": "e73097d6-8ba9-4f74-aaef-11b838dd5fa1",
        "creationTimestamp": "2022-11-04T05:19:59.975596Z",
        "completionTimestamp": "2022-11-04T05:20:00.095038Z",
        "status": "success"
    },
    "data": {
        "status": "ok",
        "response": {
            "message": "Hello, Ford Perfect!"
        }
    }
}
Notice that the API route response is a bit longer than single execution - now we have actual HTTP response and some metadata. The finalised result are under the data field.
If you get HTTP response code 404, it could mean that the API route is not ready yet - wait a bit then try again.
If you undeploy a data process after linking it to an API route, you need to manually link it up again (edit the API route, remove the old link and add the updated data process).
Finally, just like before, the execution history (with a real API route ID) will be available to view in the Data Discovery panel.
That's all! You've learned the basics of creating/deploying a data process along with an API route. Check out the tutorials and references to learn more.
TypeScript Versions of Example Code
Below is the TypeScript version that can be used as the "quick start" with CLI. After generating a TypeScript template, copy the following code to your logic files respectively.
You have to import agents (and maybe related types) from SDK. We didn't need to do that in Studio because Studio already imports everything for you.
import {
    SessionStorageAgent,
    LoggingAgent,
    HttpPayload,
    GenericContext,
    RailwayError,
} from "@fstnetwork/loc-logic-sdk";

export async function run(ctx: GenericContext) {
    // read HTTP payload
    const payload = (await ctx.payload()) as { http: HttpPayload };

    // get payload body
    const data = payload.http.request.data;

    // decode body from Uint8Array to string and convert to JSON
    const parsed: { name: string } = JSON.parse(
        new TextDecoder().decode(new Uint8Array(data)),
    );

    // log parsed payload
    LoggingAgent.info({ payload_payload: parsed });

    // extract name field (and set it to a default string "World" if not exist)
    const name = parsed?.name || "World";

    // write the name variable into session storage
    await SessionStorageAgent.putString("name", name);
}

export async function handleError(ctx: GenericContext, error: RailwayError) {
    // error logging
    LoggingAgent.error(error.message);
}
Ignore the second logic file generated by CLI. It won't do anything as long as there is no code in it.
import {
    ResultAgent,
    SessionStorageAgent,
    LoggingAgent,
    AggregatorContext,
    RailwayError,
} from "@fstnetwork/loc-logic-sdk";

export async function run(ctx: AggregatorContext) {
    // read name variable from session store
    const name = (await SessionStorageAgent.get("name")) as string;

    // finalise result
    ResultAgent.finalize({
        status: "ok",
        response: {
            message: `Hello, ${name}!`,
        },
    });
}

export async function handleError(ctx: AggregatorContext, error: RailwayError) {
    // finalise result withe error message
    const err = {
        error: true,
        errorMessage: error.message,
        stack: error.stack,
        taskId: ctx.task.taskId,
    };

    LoggingAgent.error(err);
    ResultAgent.finalize(err);
}
What's Next?
Now you've deployed your first data process in LOC, where should you go next in the docs?
- First proceed to Tutorials, which offers basic examples on specific topics and activities - all of them use JavaScript-based data processes in LOC Studio.
- The tutorials also point you to various pages in Studio Guide and SDK Reference for additional details.
- If you are a developer, you'll need to learn about CLI, which can do more and makes debugging easier - CLI Handbook plus SDK Reference have everything you need.
- See System FAQs if you'd like to know more about LOC.
Happy developing!