Send HTTP Requests Using Agent Configuration
- To create a HTTP configuration.
- To invoke a HTTP endpoint in logic using HTTP agent.
What is Agent Configuration?
LOC provides agents for operating not only internal data sources, but also external ones like HTTP endpoints, databases, FTP servers and SMTP servers. These is what makes LOC truely useful for building data pipelines across your organization.
However, these external sources often require authentication information (user account name and password, etc.), which may bring some issues:
- Hard-coding or pass unencrypted confidential data into logic would be a huge security risk.
- It would be a nightmare trying to maintain/update confidential data across numerous data processes.
Since v0.7.0, LOC provides Agent Configuration for authorised users to create and maintain connection profiles for HTTP, database, file sorage and mail agents. Here we'll learn how to create a configuration for your HTTP agent.
In order to use an agent configuration, you'll need to go through three steps:
- Create a new agent configuration.
- Add the configuration into a logic with a reference name.
- Have an agent setup its client using the reference name.
Create a Configuration
For this tutorial, we'll use the HTTP agent to invoke https://httpbin.org/anything. This is a public API that simply returns anything you've sent to it, which is ideal for testing purposes.
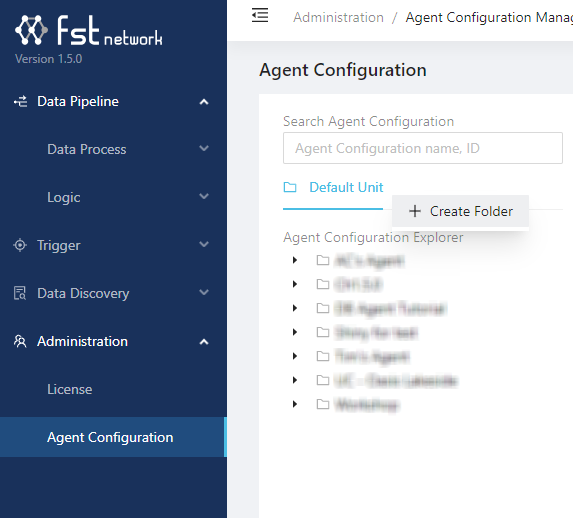
In Studio, go to Administration then click the panel Agent Configuration. Right-click on the Unit to create a folder with a name:
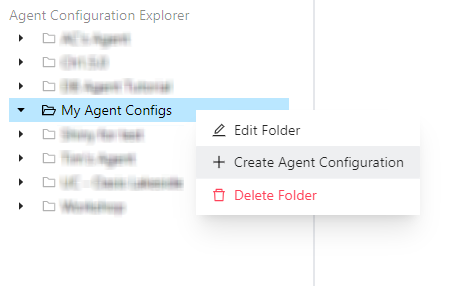
Right-click on the folder and select Create Agent Configuration to create a new one:
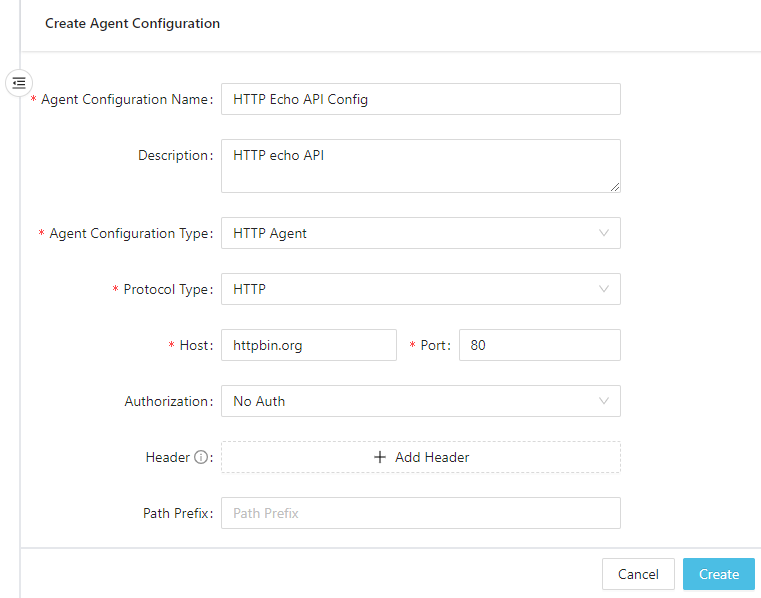
In the configuration creation window, set the HTTP config as below:
-
Name of the configuration
-
Agent Configuration Type:
HTTP Agent -
Host is
httpbin.org, scheme isHTTP, port is80, prefix is empty. -
You can add anythin in the description or to add additional custom headers.
Custom headers added in configuration window and logic code will both be included in the HTTP request.
Create a HTTP Configuration to Invoke API Routes
You can, in fact, create a HTTP configuration for your LOC server itself! This allows you to use one data process to invoke another:
- Protocol type:
HTTPs - Host: the API route host, for example,
api.xxxxxx.fst.network - Port:
443 - Authorization:
No Auth
Be noted that the extra waiting time will cause the first API route to return 202 after the task exceeds the 15 second limit.
Finally click Create.
Logic and Data Process Walkthrough
In this example we'll create a generic logic HTTP Echo Response and a data process. The latter will be consisted with two other reusable logic.
| Logic | Name | Purpose |
|---|---|---|
| Generic logic #1 | Payload JSON Parser (source) | Read and parse JSON payload |
| Generic logic #2 | HTTP Echo Response | Invoke HTTP API with parsed payload and pass down the parsed response body |
| Aggregator logic | Result Aggregator (source) | Finalise task result |
import {
    LoggingAgent,
    SessionStorageAgent,
    HttpAgent,
} from "@fstnetwork/loc-logic-sdk";

export async function run(ctx) {
    // read parsed JSON from session
    const parsed = await SessionStorageAgent.get("parsed");

    // create a HTTP client using a agent configuration reference
    const httpClient = await HttpAgent.acquire("http-echo-api-config");

    // log status
    LoggingAgent.info("HTTP client required successfully");

    // invoke HTTP API
    const response = await httpClient?.fetch("/anything", {
        method: "POST",
        headers: {
            "Content-Type": "application/json; charset=UTF-8",
            "X-Custom-Id": "Studio", // custom header
        },
        body: JSON.stringify(parsed),
    });

    // log status
    LoggingAgent.info("HTTP request sent");

    // if the response is HTTP 200 OK or 301 Move Permanently,
    // read and parse the response body
    let body = null;
    if (response.ok || response.status === 301) body = await response.json();

    // prepare result
    const result = {
        http_config_name: "http-echo-api-config",
        http_status: response.status,
        response_body: body,
    };

    // log result
    LoggingAgent.info(result);

    // store result in session
    await SessionStorageAgent.putJson("result", result);
}

export async function handleError(ctx, error) {
    // error logging
    LoggingAgent.error({
        error: true,
        errorMessage: error.message,
        stack: error.stack,
        taskId: ctx.task.taskKey,
    });
}
Create the data process with the three required logic, and we'll now move on to the agent configuration part. It is possible to add agent configurations on a data process' creation, but you get the idea.
Add a Configuration to a Linked Logic
A configuration has to be added to a logic in a data process so that the HTTP Agent can access the configuration during task execution and returns a working HTTP client object.
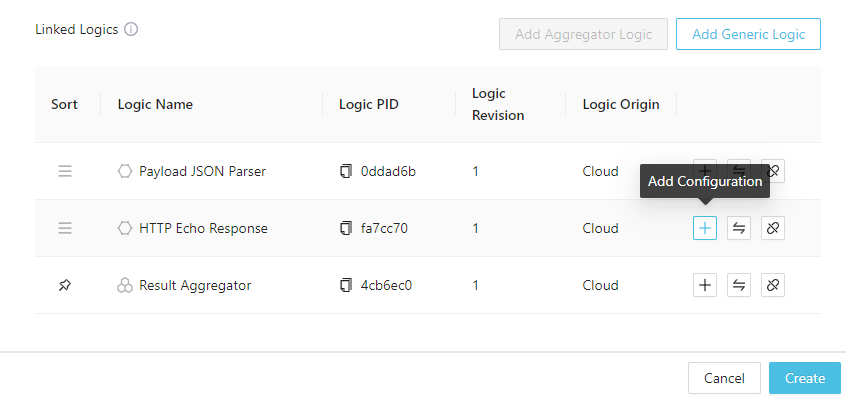
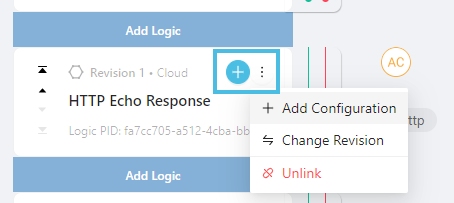
While creating the data process, click the + icon of HTTP Echo Response logic:
If your data process is already created, you can edit it and add the configuration (which will create a new revision):
In the "Add Configuration" window, click Add a row:

Then click on the Agent Configuration Name text area to find your configuration:
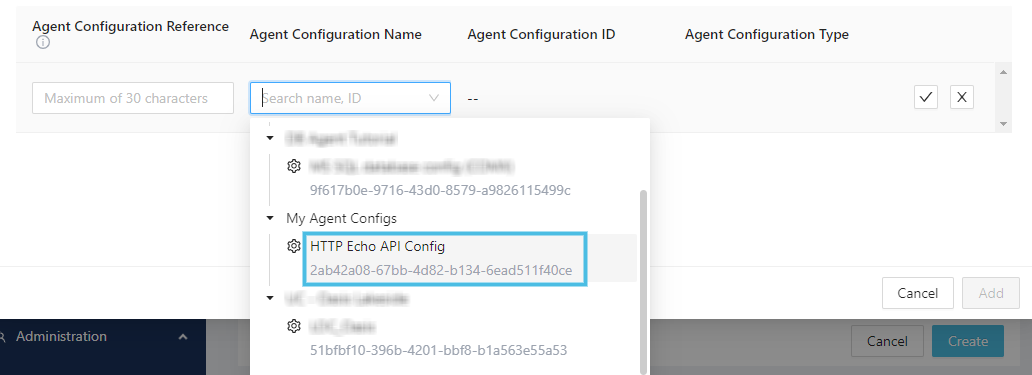
Give the configuration a referenece name for the logic (in this case we named it http-echo-api-config) then click OK:

Finally click Add to finish adding the configuration.
The agent would throw an error if the reference name is not found.
If you wish to create multiple clients from the same agent configuration in a logic, you'll need to add multiple reference names as well.
After the data process is created (or modified), you should see a configuration icon ("A") has appear beside the logic:
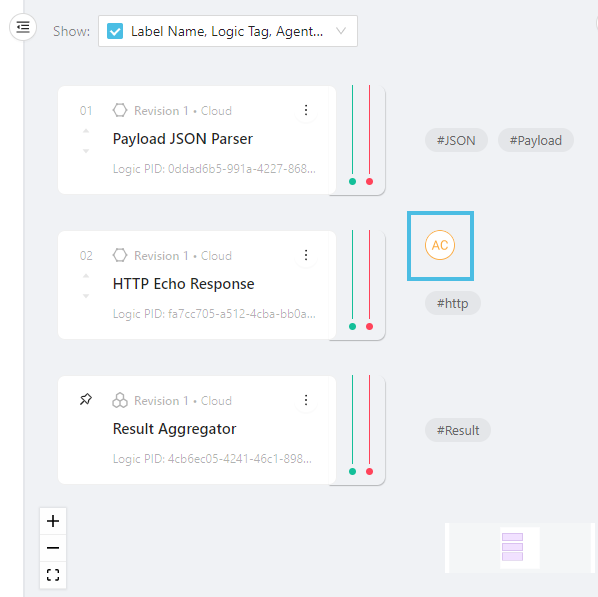
This indicates we have added the HTTP configuration to the logic, and the data process is ready to go.
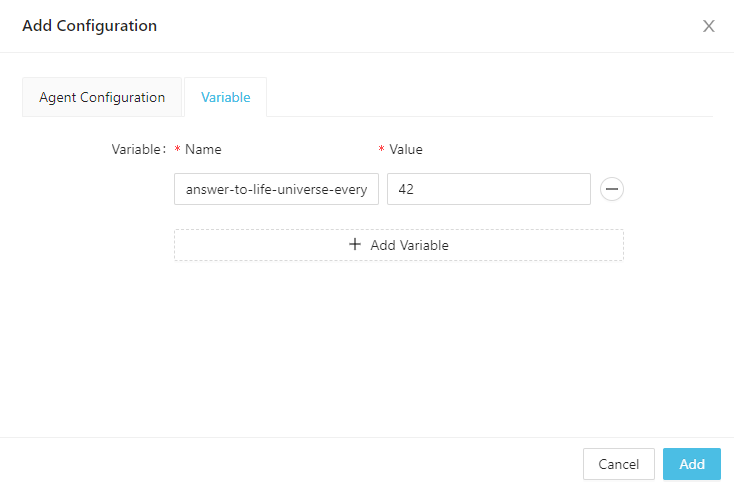
Setting Logic Variables
The Variable panel above is for setting up logic environment variables. See Logic Variable Agent for how to access them in logic.
Test the HTTP Agent
Now you can try to invoke the data process with a JSON payload, either using manual trigger or via an API route.
For example, if you send this as your payload:
{
    "name": "Zaphod Beeblebrox",
    "title": "Ex-Galactic President",
    "number-of-heads": 2
}
The task result returned shoudl be like this, which contains the full HTTP response body from the HTTP endpoint:
{
    "status": "ok",
    "taskKey": {
        "executionId": "ZOMztR4SNYuGe7Js2z73qg",
        "taskId": "xmpXcyICbcV5aENdW2h1sA"
    },
    "response":{
        "http_config_name":"http-echo-api-config",
        "http_status":200,
        "response_body":{
            ...
            "headers":{
                "Accept":"*/*",
                "Accept-Encoding":"gzip, br",
                "Accept-Language":"*",
                "Content-Length":"80",
                "Content-Type":"application/json",
                "Host":"httpbin.org",
                ...
            },
            "json":{
                "name":"Zaphod Beeblebrox",
                "number-of-heads":2,
                "title":"Ex-Galactic President"
            },
            "method":"POST",
            "origin":"35.81.150.116",
            "url":"http://httpbin.org/anything"
        }
    }
}
This shows that the HTTP agent configuration is setup correctly and the HTTP agent invoked the external API endpoint without issues.